Another oldie but goodie of the nail art universe: the border nails.
Super minimal and easy to do, it is a great option for those who like nails art but don’t want anything extravagant.
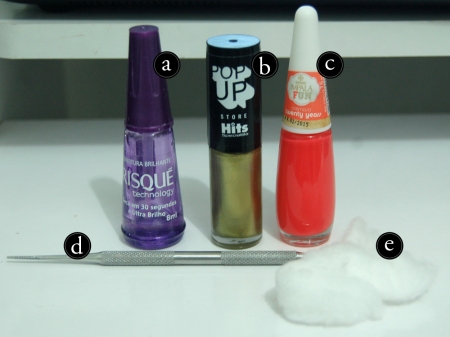
You will need:
a. Top coat
b. Base color (I used Gold Locks from Hits Speciallitá)
c. Top color (I used Twenty Years from Impala)
d. Orange stick
e. Cotton and nail polish remover
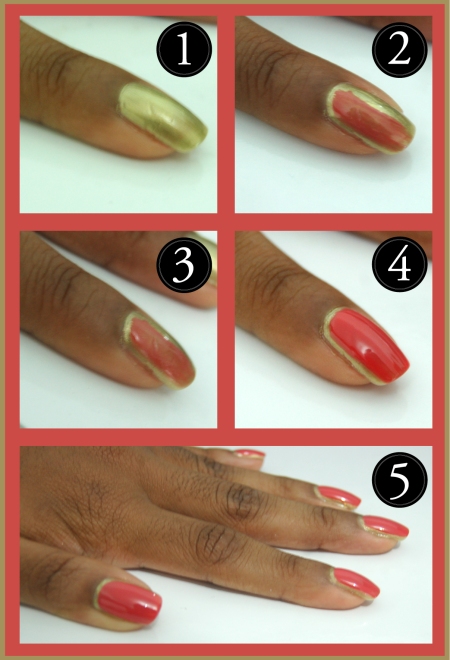
Step-by-Step:
1. Apply a thin layer of the base color and wait for it to dry.
2. and 3. To apply the top color, first paint half of the nail, starting from the middle, so it is easier to leave the border.
4. Paint the other half of the nail and if necessary, apply a second coat. This also allow you to correct any imperfections of the first coat.
5. Finish it with the top coat. Clean up and you’re done!
—
Outro tutorial de nail art antigo, mas que ainda está muito em alta: border nails.
Minimalista e fácil de fazer, é uma ótima opção para quem gosta de nail art mas que não gosta de nada muito extravagante.
Você vai precisar de:
a. Cobertura brilhante
b. Cor base (eu usei Gold Locks da Hits Speciallitá)
c. Cor principal (eu usei Twenty Years da Impala)
d. Palito para limpar
e. Algodão e removedor de esmalte
Passo a passo:
1. Aplique uma fina camada da cor de base e espere secar.
2. e 3. Para aplicar a cor principal, primeiro pinte metade da unha, começando pelo centro. Dessa maneira é mais fácil de delimitar a borda.
4. Pintea outra metade da unha e, se necessário, aplique uma segunda camada. Isso também permite corrigir qualquer imperfeição daprimeira camada de cor.
5. Finalize com a cobertura brilhante. Limpe os excessos e pronto!